%%{init:{'themeCSS': ".actor {stroke: DarkBlue;fill: White;stroke-width:1.5px;}", 'sequence':{'mirrorActors': false}}}%%
sequenceDiagram
participant W as Working folder
participant S as Staged
participant H as History
W->>S: Add
S->>H: Commit
16 Version control with Git
Tracking what changes have been made to your files is an incredibly useful tool for managing your analysis project. It also makes it much easier to collaborate with others (like yourself in the future) and to share your work. Sharing your analysis code is a critical step in ensuring your research is reproducible. This session will cover what version control is and how to do it using Git within RStudio.
16.1 Learning objectives
- Explain what “formal” version control is and recognize its importance.
- Use the basic functionality of Git for version control through RStudio’s integrated Git interface.
- Describe and apply the basic workflow of Git version control: View changes to files, record and save those changes to a history, called “committing”.
16.2 📖 Reading task: What is version control?
NoteInstructor note
Before starting this session, get them to share some of the things they discussed during the social activity.
They will have already read it once before, during the pre-workshop tasks. Tell them that they’ll read it again to refresh their memories and reinforce the concepts. This is important because Git and version control is something that is very difficult to conceptually understand and takes some time and practice.
For the reading parts, let them read it first and then walk through the material again, to reinforce the importance of version control and doing it formally. So give them a heads up that you’ll be repeating things, specifically to reinforce the concepts.
It’s important in this session to go slowly. Version control is a challenging topic and isn’t something most people have ever learned about or dealt with. So take it slow and make sure everyone is on the same page. Make use of stickies frequently to assess how everyone is doing.
Time: ~8 minutes
Warning
This session is very text and reading heavy compared to other sessions. This is mostly because this topic requires a mental paradigm shift in how you view files, and requires you to change your habits of how you normally work. While you may get more short-term use out of the R portion of this workshop, knowing and using version control concepts and tools will fundamentally change how you work over the long term. While the concepts are quite difficult, the tools to use the concepts aren’t, and using them often will make the concepts easier to understand.
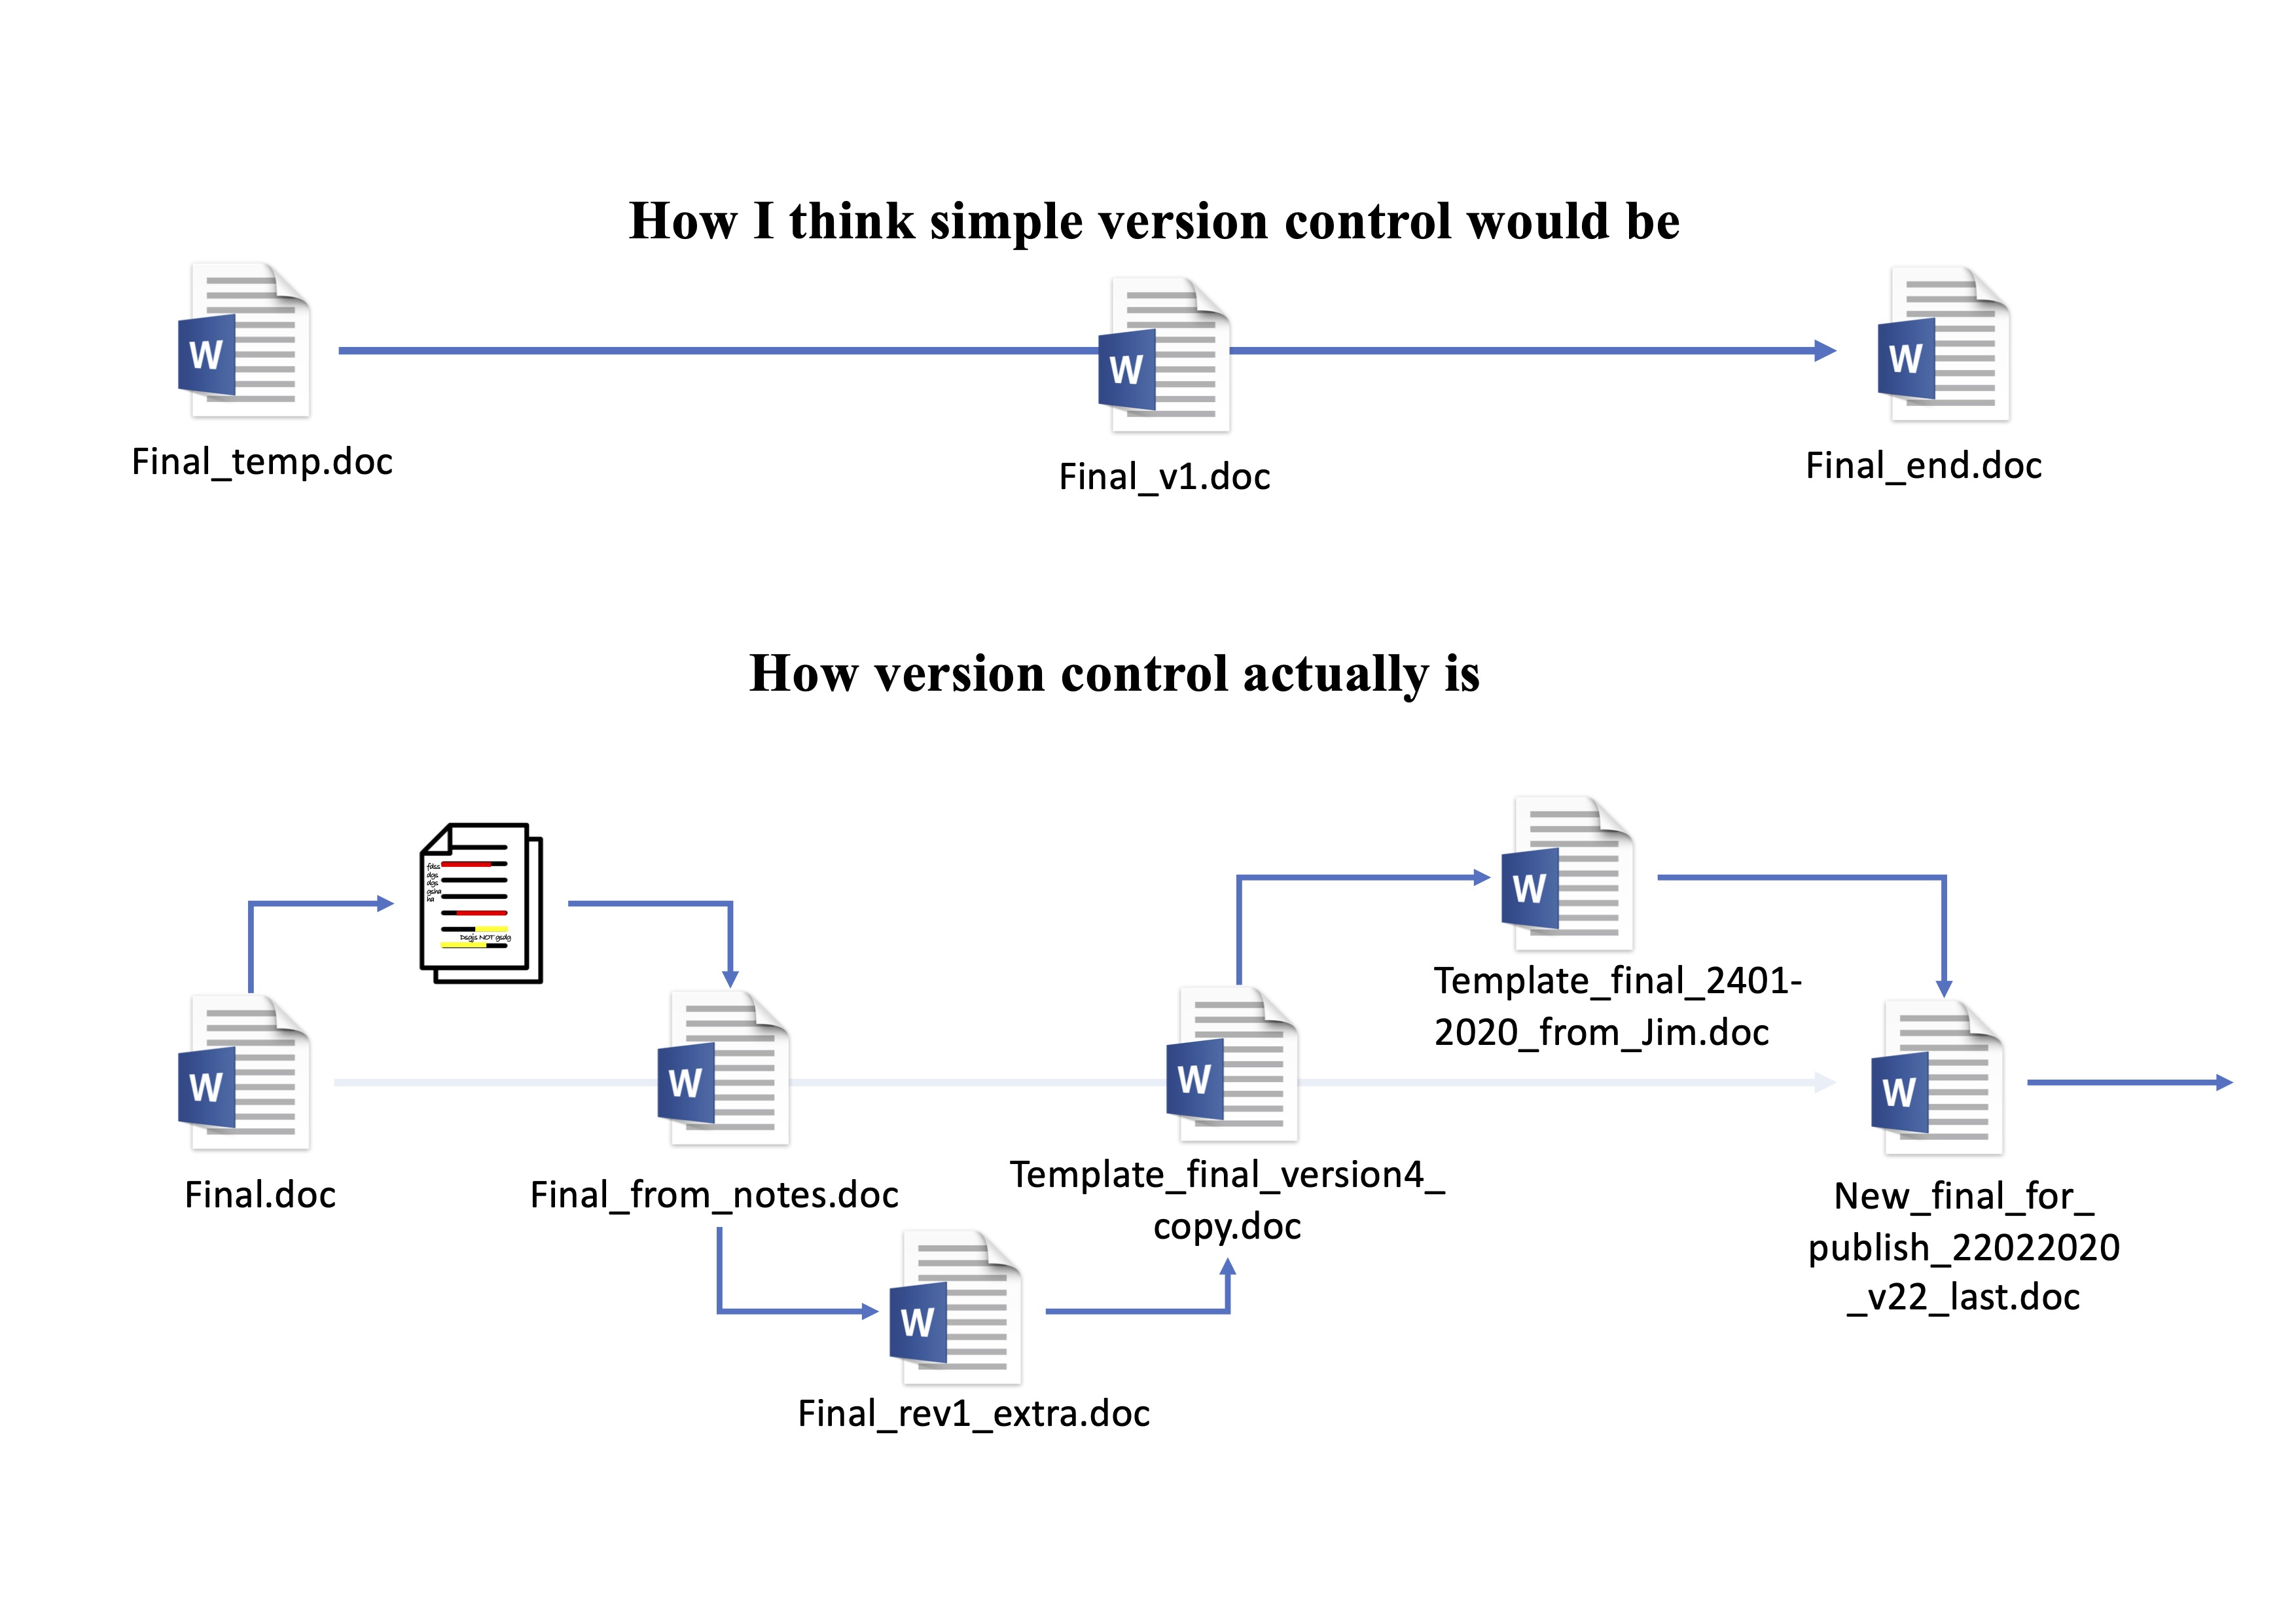
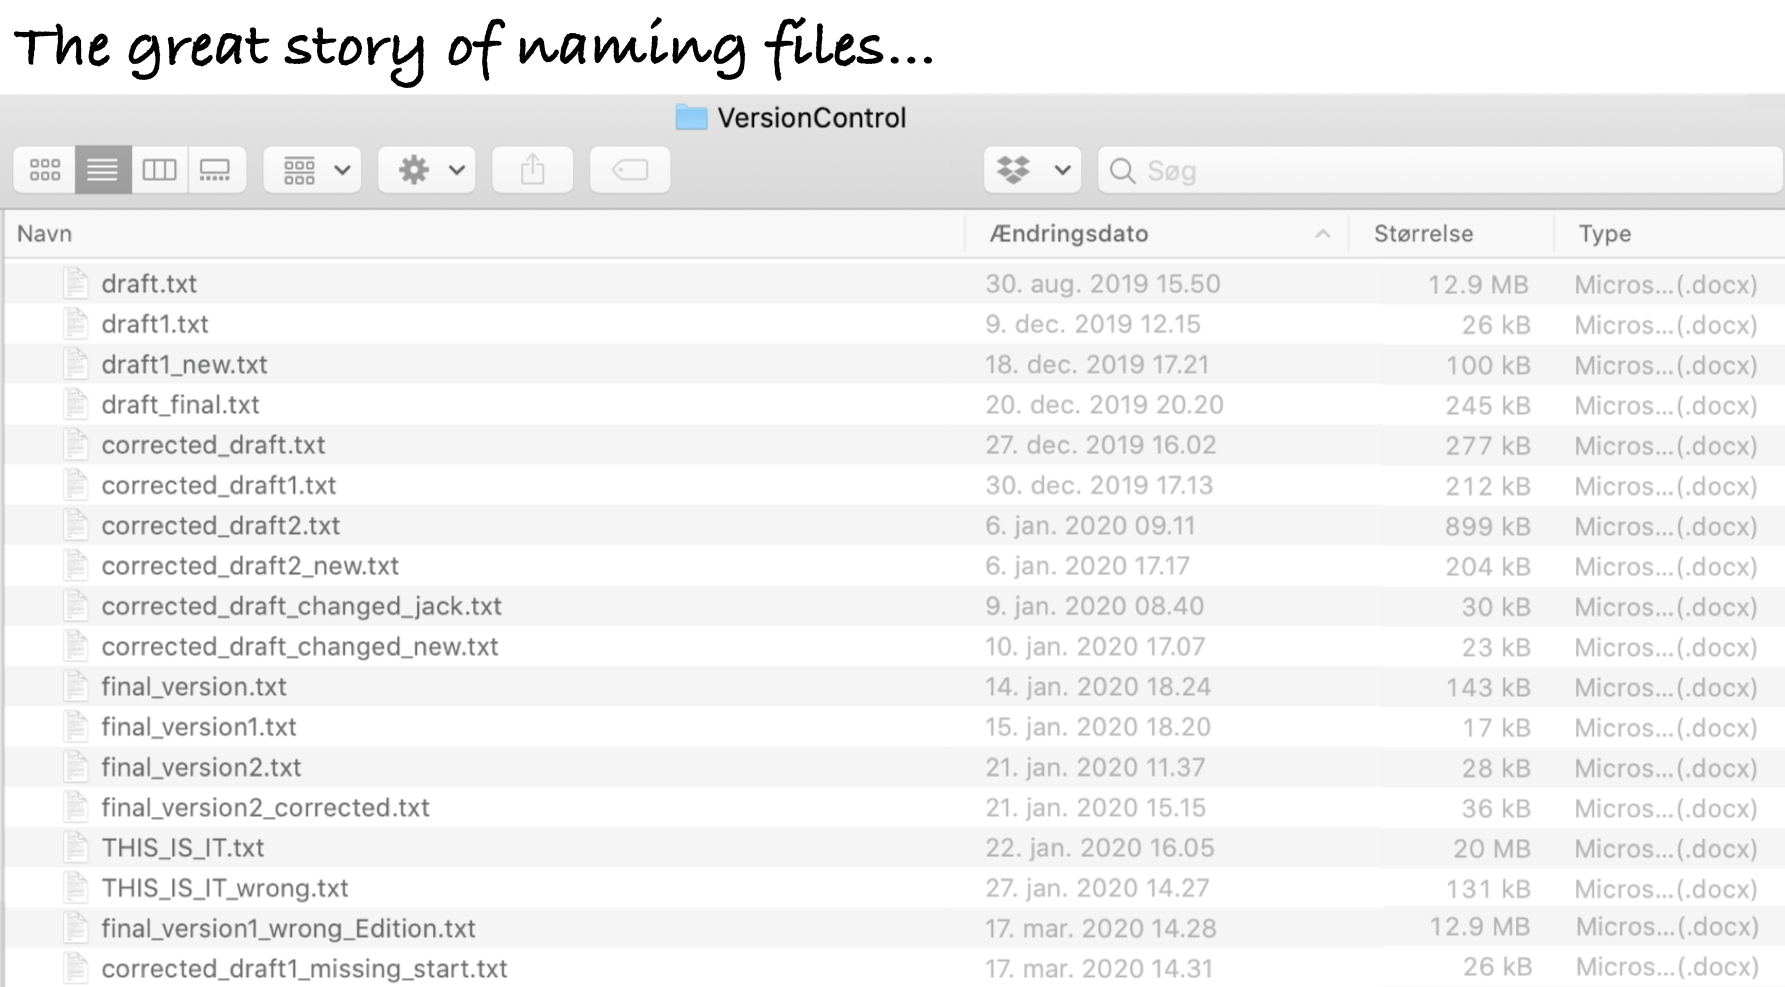
Does this way of saving files and keeping track of versions look familiar? While the above images are teasing a bit, there is truth to it: It is the most commonly used “version control”.
This form of version control, while common, is fairly primitive, informal, and very manual. It isn’t ideal because it requires making multiple copies of the same file, even if changes are made to only one small part of the file. This approach also makes it difficult to find specific changes.
There are, however, formal version control systems that automatically manage changes to a file or files. These formal version control systems take snapshots of changes done to files, which are usually called “revisions” or “commits”. These “commits” record what was changed since the previous “commit”. When you make these “commits”, you have to create a short message on what or why you made a change. These “commits” and their messages are stored as a log entry in a history. This history then has all this information, for each commit, on which file or files were changed, what was changed within the file(s), who changed it, and a short message about the change. This is extremely useful, especially when working in teams, or for yourself 6 months in the future (because you will forget things), since you can go back and quickly see what happened and why.
To understand how incredibly powerful version control is, think about these questions:
- How many files of different versions of a scientific documents or thesis do you have laying around after getting feedback from your supervisor or co-authors?
- Have you ever wanted to experiment with your code or your report and need to make a new file so that the original is not modified?
- Have you ever deleted something and wish you hadn’t?
- Have you ever forgotten what you were doing on a project, or why you chose a particular strategy or analysis?
All these problems can be fixed by using formal version control! There are so many good reasons to use version control, especially in science:
- Transparency of work done to demonstrate or substantiate your scientific claim.
- Claim to first discovery, since you have a time-stamped history of your work.
- Defense against fraud, because of the transparency.
- Evidence of contributions and work, since who does what is tracked.
- Keeping track of changes to files easily, by looking at the history of changes.
- Easy collaboration, because you can work on a single file/folder rather than emailing versions around.
- Organized files and folders, since there is one single project folder and one single version of each file, rather than multiple versions of the same file.
- Less time finding things, because everything is organized and in one place.
In this session we’ll be covering a version control tool called Git. While Git on its own can be quite difficult to use, RStudio thankfully has an amazing and straight-forward integration to it.
16.3 📖 Reading task: What is Git?
Time: ~5 minutes
Git is one of several version control system tools available. It was developed to help software programmers to develop and manage their work on Linux (an operating system like Mac or Windows). Sadly, it was designed by and for software programmers and not for non-programming users like us researchers. So why do we teach it? Because Git has so many great features that fit with how science and data analysis is done.
- Like R, it is open source, so it’s free and anyone verify how trustworthy and correct the code is.
- It is very popular and so has a very large online community that provides support, documentation, and tutorials on how to use it.
- The vast majority of open source projects and work, such as making R packages, are done using Git and are hosted on GitHub, which is a company that hosts Git “repositories” (i.e. projects) online.
- For example, all RStudio code and tidyverse packages are on GitHub.
- There are many open scientific projects that use Git and are hosted on GitHub, e.g. rOpenSci organization or MRC Integrated Epidemiology Unit.
- RStudio has an amazing interface and integration with Git.
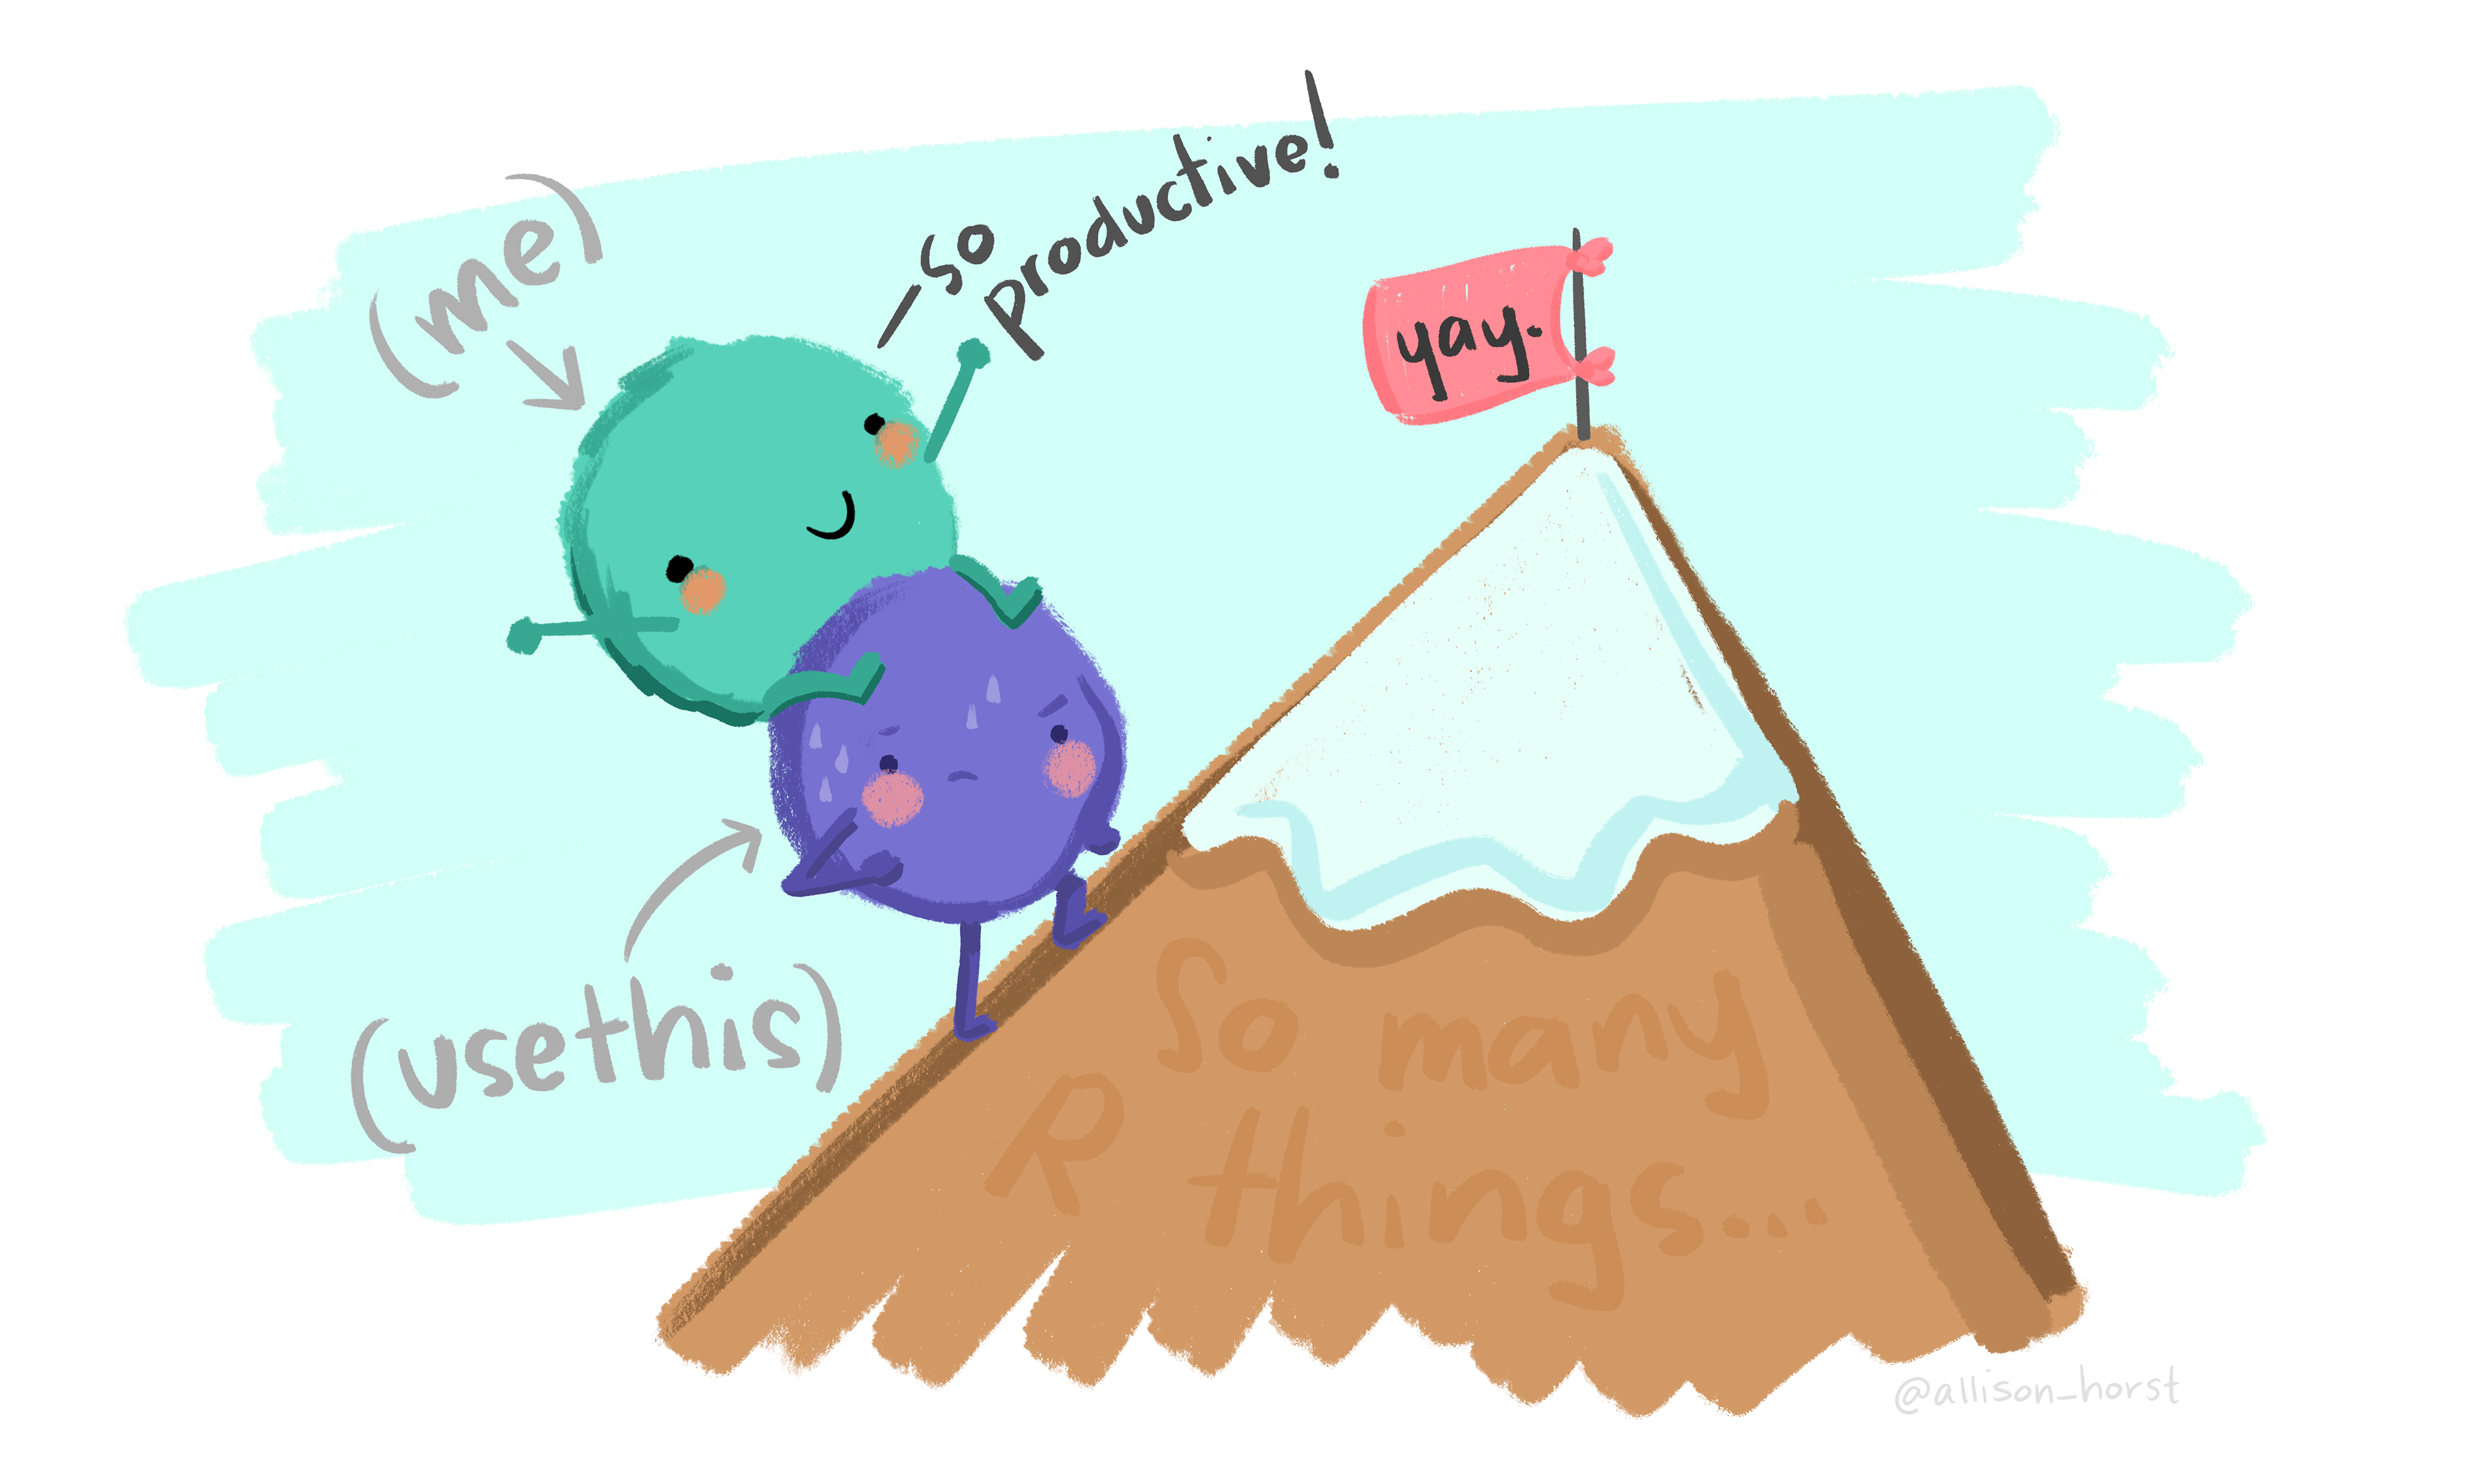
While learning Git and version control can be difficult and has a steep learning curve, like learning R, it is ultimately an investment into your future productivity and effectiveness as a researcher. It is very much worth it to learn and use it as often as you can.
While many people may use Git to manage their R scripts, you can also manage other non-code based files like Word or images in Git. Version control is useful for any project that uses any type of files since they can be saved in the Git history (though there are some limitations to using Git for files that are not plain text like R scripts are). You can save files into the history by adding and committing them (as we will learn to do shortly).
16.4 📖 Reading task: Basics of Git
Time: ~8 minutes
Git works by tracking changes to files at the project level (i.e. for every R Project). So you won’t track your entire, for instance, Documents/ folder. When file changes are saved and put into the history, this history is called a “repository” (also called a “repo” for short). We’ll explain more about what a repository is later. What you do with Git is more or less to:
- Set up Git in your project or folder by starting it as a “repository”.
- Tell Git to track a file by preparing it to be saved to the history.
- Save changes to files in the history with a message you recorded about the change.
Other things you can do with Git:
- Check what’s been changed or added in your files since the last save.
- Check the history for what was previously changed or added.
When working with GitHub, there are extra things you can do (more on this later):
- Synchronize the Git repository on your computer with the repository on your GitHub, called “push” (upload) and “pull” (download).
So first off, what exactly is the Git repository? The Git repository works at the project (the folder) level because it stores the version history in the hidden .git/ folder as shown in the file diagram below. In Windows, this folder will probably not be hidden, but in Mac and Linux, files and folders that start with . are automatically hidden. The .git/ folder itself is the repository used by Git to store the file changes and history of the project. So don’t delete it!
Another important file for managing the repository is the .gitignore file. This file tells Git to not track (or “watch”) certain files, such as temporary files. This is particularly important for making sure you don’t save personal data in the Git history. Personal sensitive data should be stored in a secure location and should only be accessed in the R Project by loading it from that secure location.
LearningR
├── .git/ <-- Git repository stored here
├── R/
├── data/
├── data-raw/
├── docs/
├── .gitignore <-- Tells Git which files NOT to save
├── LearningR.Rproj
├── DESCRIPTION
├── TODO.md
└── README.md
Setting up a Git repository can be done in several ways:
- When starting a new R Project, the “Create a git repository” option can be selected from the “New Projects” setup instructions in RStudio.
- For existing R Projects, you can type in the console
usethis::use_git()(don’t do this for the workshop!). - The prodigenr package will automatically set up Git for the project.
What should a Git repository contain? In general, a common pattern is that one Git repository is one RStudio R Project, which should be one research project. This helps ensure your project is reproducible and makes things much easier to manage and share as you work on the project.
16.5 Using Git in RStudio
NoteInstructor note
Since they will be using the Git interface quite a bit, really take your time walking through it and describing it. Show where things are and what things to focus on for this workshop.
Git was initially created to be used in the terminal (i.e command-line). However, because RStudio has a very nice interface for working with Git, we’ll be using that interface so we don’t have to switch to another application. While the terminal provides full access to Git’s power and features, the vast majority of daily use can be done through RStudio’s interface.
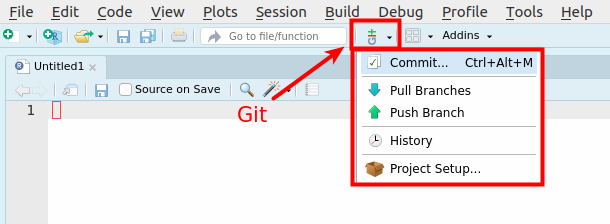
To access the Git interface in RStudio, click the Git icon beside the “Go to” search bar (see Figure 16.4) and then click the “Commit…” option using Ctrl-Alt-MCtrl-Alt-M or with the Palette (Ctrl-Shift-PCtrl-Shift-P, then type “commit”).
The Git interface should look something like Figure 16.5 below. A short written description is given below the image.
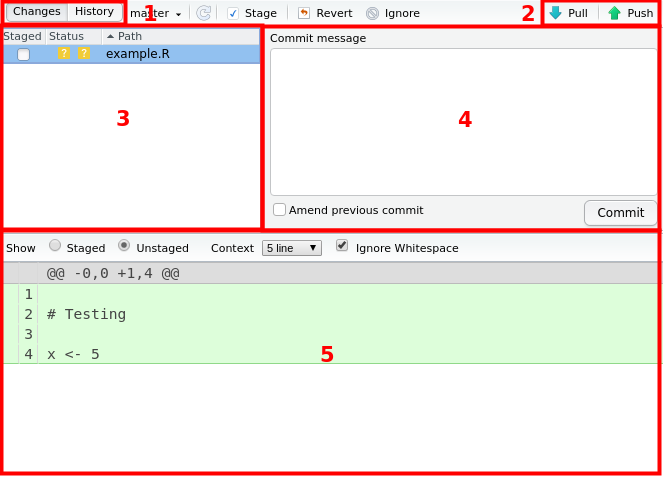
- This is the “Changes” and “History” buttons that allow you to switch between views. Changes is what is currently changed in your files relative to the last history item. History is the record of what was done, to what file, when, and by whom.
- These are the “Push” and “Pull” buttons that are used to synchronize with GitHub, which we will cover later in the session.
- This is the panel that lists the files that have been modified in some way. You add (“stage”) files here that you want to be put into the history.
- This is the Commit Message box where you write the message about the changes that will be put into the history.
- This is the panel that shows what text has been modified, added, or removed from the file selected in panel 3. Green highlight indicates that something has been added, while red indicates a removal. Changes are detected at the line level (what line in the file). For files that aren’t plain text-based (e.g. Word), you can not see what specifically was changed, it will only say that there is a change.
NoteInstructor note
Do this part as a code-along, after having explained the above first.
So far, it should show a bunch of files that we’ve added and used over the previous session. In the Git interface, select the README.md file. You should see the text in the file, all in green. Green means the text has been added. Red, which you will see shortly, means text was removed.
A README.md file is an important document to orient people to your project. Think of it as the “metadata” about your project, so it’s a good idea to add some basic explains about your project in it.
Now click the “Staged” checkbox besides the README.md file to get it ready to be saved into the history. You’ve now “added” it to the staged area. Note that when you have a lot of files to stage, you can stage them all at once by pressing Ctrl-A to highlight and select all the files and then clicking the “Staged” checkbox (or hitting Space) on one of the files. The box on the right side is where you type out your “commit” message. “Commit” means you save something to the history of changes. You “commit” it to the history, like you “commit” something to your own memory.
16.6 📖 Reading task: States of Git
NoteInstructor note
Verbally explain the below after they’ve read it to reinforce the concepts.
Time: ~5 minutes
Before we move on, there are some things to know about how Git works. In Git, there are three “states” that a file can be in, listed below and summarised in Figure 16.6.
- The Working folder state is where all files are, whether they are “untracked” or “tracked”. Untracked is when Git sees the file, but it has not yet entered the history. Tracked is when the file has been saved in the history and Git “watches” it for changes.
- The Staged state is when a file has a change that is different compared to the version in the history and it has been checked (“added”) into the “Staged” area (by ticking the checkbox beside the file in the Git interface).
- The History or Committed state is when a “commit” message has been written and the file with its changes has been saved into the repository history.
This system allows us to keep a journal (a log) of what has been changed, why it has been changed, who changed it, and when. Figure 16.7 below shows an example log of the history of a previous version of this lesson, which makes it easy to get an overview of what is happening in a project.
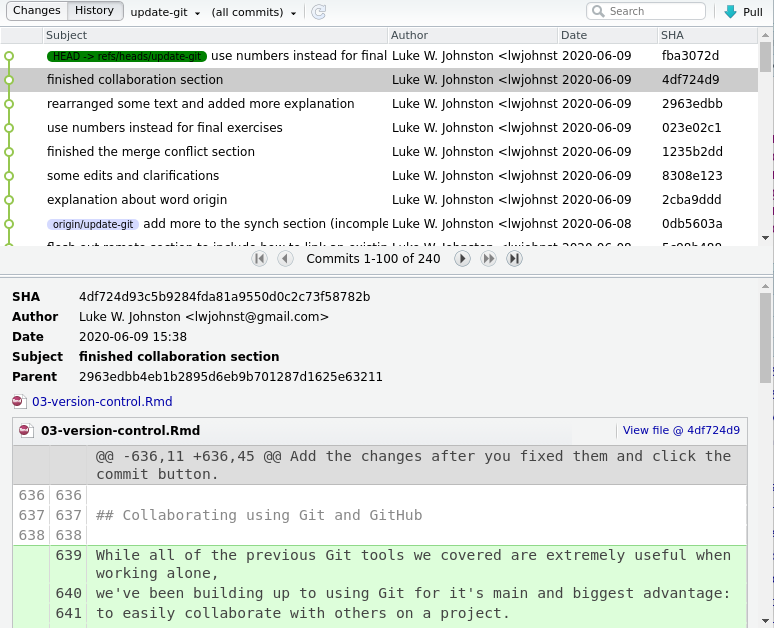
You may notice that the messages in the log give a bit of detail about why a change was made, though it’s not always the case. Sometimes a message like “minor edit” is enough, because it was a minor edit.
A general tip for writing an effective commit message is to be concise but meaningful. Writing down meaningful messages can save you a lot of time in the future when you come back to a project after some time and forget what you were doing. With a well written history you can get a quick idea or reminder about the state of the project.
16.7 Adding changes to the Git History
NoteInstructor note
For going over the Git history pane, demonstrate how you can open a file at that commit, so that nothing is ever lost.
Ok, now we will write something like “Add initial README file” in the commit message box and commit the change. After clicking “Commit”, you’ll notice that the README.md file is no longer on the left side. That’s because we’ve put the change into the history. We’ll return to that shortly.
Note
Some Mac users may get an error with committing changes. RStudio seems to set a default option that causes this issue. Fix this by going to “Global Options”, then “Git/SVN”, and then unchecking the “Sign git commits” box (or something similar that mentions GPG or signing).
Next, open up the README.md file in RStudio using the Files tab. At the top of the file, write your name and your field of research, and then save the file. Open up the Git interface again (with the Git icon or with Ctrl-Alt-MCtrl-Alt-M or with the Palette (Ctrl-Shift-PCtrl-Shift-P, then type “commit”)). You should now see the added text in green. Alright, now “Stage” the change (click the checkbox), write a message like “added my name to README file”, and commit the change.
We can view the history by clicking the “History” button in the top-left corner of the RStudio Git interface. Here you can see what has been done in previous commits. The “History” section is quite powerful. As long as you commit something into the Git history, it will never be completely gone1. For instance, we can see the full contents of a file at a specific commit by clicking the commit, moving to the file you want to look into, and clicking the link that says View file @ .... Try that with the second commit of the README file. It shows you what the file was like in that commit, so we can always go back the changes we made there.
A question that may come up is “how often should I commit”? In general, it’s better to commit fairly frequently and to commit changes that are related to each other and to the commit message. Following this basic principle will make your history easier for you to read and make it easier for others as well.
16.8 Ignoring files with .gitignore
Note🧑🏫 Teacher note
Reinforce that we don’t always want Git to track everything. Make sure to explain why we want to ignore generated files and what the * means (wildcard for any characters).
We already read about the .gitignore file earlier. There are actually some files that we don’t want to track as we work on our project. We use Quarto to build documents that others can read, such as HTML or Word files. Because these files are generated from our Quarto files, we don’t need to track them in Git. As long as we have the original Quarto files, we can always regenerate the HTML or Word files later. Tracking these generated files can also lead to unnecessary problems later on, so it’s best to not track them at all. So let’s tell Git to not track the HTML files as well as the folders ending with _files/ that are generated alongside the HTML files by Quarto.
We can quickly do this by using the usethis package. In the RStudio Console, type in the following code:
Console
usethis::use_git_ignore(c("*.html", "*_files/"))The * is a “wildcard” that means “any characters”. So *.html means “any file that ends with .html”. Similarly, *_files/ means “any folder that ends with _files/”.
After you run this, it should tell you that it has added these files to the .gitignore file. Let’s open up the Git interface again with Ctrl-Alt-MCtrl-Alt-M or with the Palette (Ctrl-Shift-PCtrl-Shift-P, then type “commit”) to see the changes made. When we click the .gitignore file, we can see that the two lines have been added to the file. These two lines tell Git to not track any files that end with .html as well as any folders that end with _files/. Let’s stage and commit this change with a message like “Ignore generated HTML files and folders”.
16.9 🧑💻 Exercise: Committing everything to the history
Time: ~15 minutes.
When working on your own projects and when you use Git, you will be committing a lot of changes to your files into the Git history. Part of the initial barrier is simply getting used to this workflow of committing what you’ve changed. Use this exercise to get some practice. We will be using this workflow often throughout the rest of the workshop.
- Practice the add-commit (“add to staging”-“committing to history”) sequence by adding and committing each of the remaining files (or folders) in your R project one at a time into the Git history. At the end, all of your files and folders should be committed to the history. While you could add and commit them all at once, we want you to do them one at a time so you practice using this workflow.
- Make sure to write a meaningful and short message about what you added and why. In this case, the “why” is simply that you are saving the file into the history for the first time.
- Once all the files have been added and committed, add a new line to the end of
docs/learning.qmdwith an level 2 Markdown header (##) with a title of “Testing for Git”. Then type out a sentence below the header with some random words, maybe about the weather. Add and commit that new line you’ve written using Ctrl-Alt-MCtrl-Alt-M or with the Palette (Ctrl-Shift-PCtrl-Shift-P, then type “commit”).
16.10 Summary
- Use the version control system Git to track changes to your files, to more easily manage your project, and to more easily collaborate with others.
- Git tracks files in three states: “Working directory”, “Staged”, and “History”.
- The Git repository contains the history.
- The main actions to move between states are:
- “Add to staging”
- “Commit to history”
- When committing to history, keep messages short and meaningful. Focus more on why the change was made, not what.
- Almost all Git actions can be done using RStudio’s Git interface.
16.11 Survey
Please complete the survey for this session:
This isn’t completely true, you can delete stuff, like if you accidentally add a password or personal data.↩︎